Adding Users & Permissions
ti Learn about user permissions including account level, performance report and filter group permissions and how to add and set user permissions.
User Permissions
Before you get started adding users, it is important to understand how permissions work. There are three types of user permissions that can be set:
Account Level Permissions: Gives broad level access to your calendar and account. Account level permissions include admin, promo manager, collaborator & viewer.
Performance Reporting Permissions: PromoPrep lets you connect to 3rd party systems to import performance data like revenue. You can restrict access to performance reporting for each user
Label Permissions: Promo labels let you organize and filter promos into channels, categories, message types, etc. You can restrict the access level of labels for each user.
Account Level Permissions
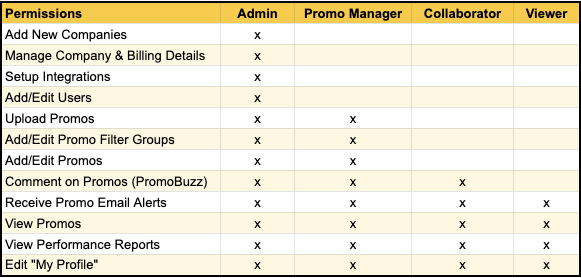
Users can be granted one of four permission levels : Admin, Promo Manager, Collaborator and Viewer. Account level permissions can be set when users are first added to PromoPrep or after a user has been added.
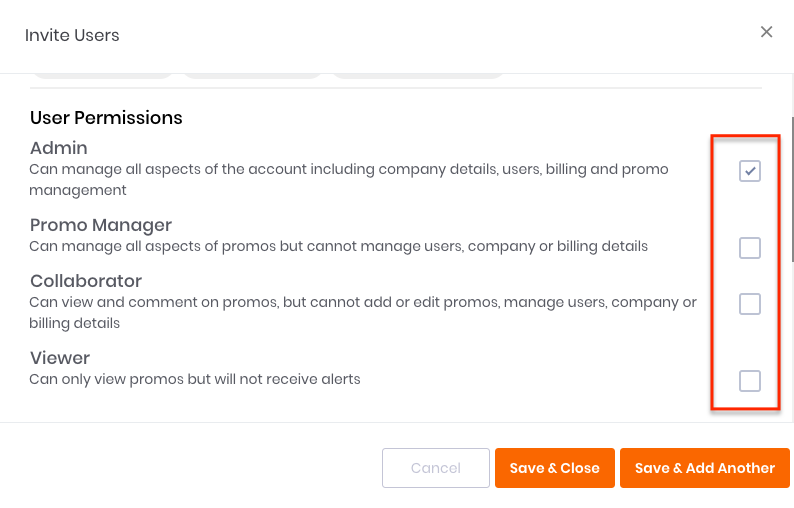
Admins can manage all aspects of the account including company details, users, billing and promo management. Admins can also delete other admins and adjust other admins’ settings.
Promo Managers can manage all aspects of promos but cannot manage users, company or billing details. This is great for anyone in your organization that will be adding and changing promos.
Collaborators can view and comment on promos, but cannot add or edit promos, manage users, company or billing details. This level is great for creative and merchandising teams for agency partners.
Viewers can only view promos but will not receive alerts. This level is good for team members that just need to see what is going on with your marketing calendar but do not need to participate in active management.
Performance Report Permissions
PromoPrep can be setup to import performance data from sources like Google Analytics, Shopify and your own data files. However, there may be performance data you do not want certain users to access. You can restrict users from seeing areas of PromoPrep that include performance data.
Performance report permissions can be set when users are first added to PromoPrep or after a user has been added.
Promo Label Permissions
Labels allow you to organize your company’s promos into groups like channels, categories, and message types.
However, there may be cases where you don’t need or want users to access activities in certain groups. For instance, if you have channels setup with email and paid search, you can restrict users on the email team from accessing the paid search promos.
Or, if you manage several brands within the same calendar, you can setup channels to include brands and restrict certain users from accessing brands they do not work on.
Label access can be set when users are first added to PromoPrep or after a user has been added.
Adding Users
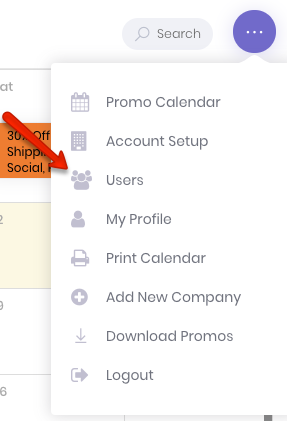
With the paid plans you can add users to your company. To get started, select Users from the menu in the top right of your calendar:
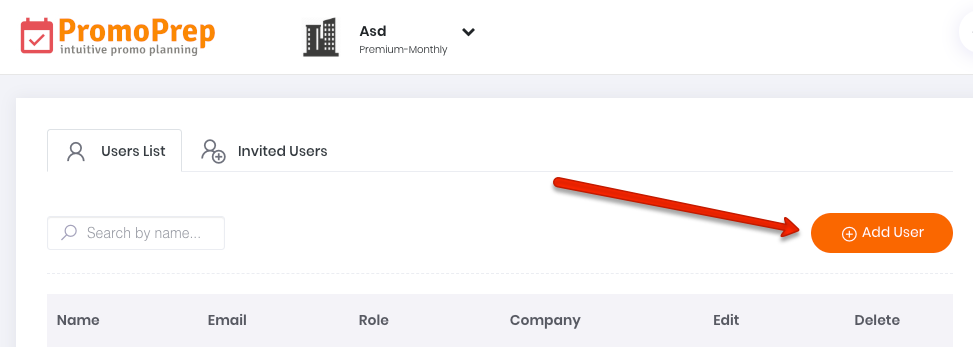
From the users page, click the Add User button:
Add email address of the users you need to add. In the email field, multiple users can be added at one time if they will have the same permission levels.

Select an account level permission setting for the group of users being added. Learn more about choosing permission levels.
If these users need access to performance reports, check the reporting access check box. Learn more about performance report level permissions.
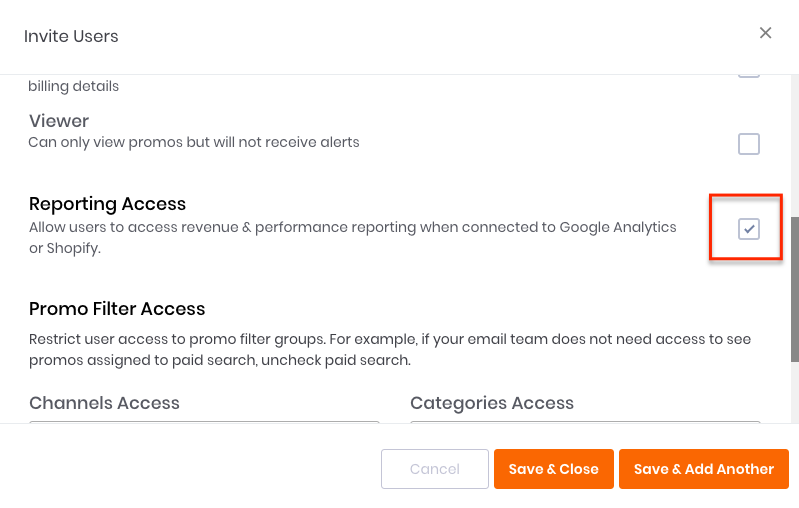
Select the filter groups these users can access. By default access to all groups is selected. Learn more about labels.
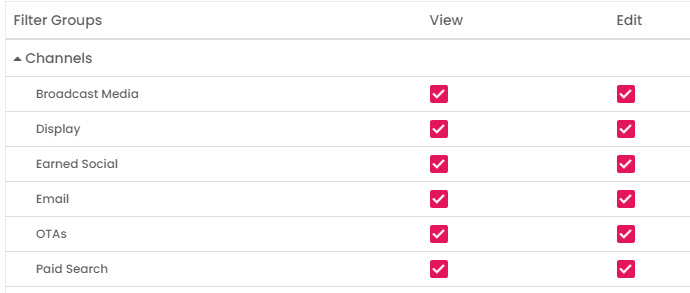
If you are done adding users, hit Select Save & Close. If you need to add more users with different permission levels, click Select & Add Another.
Once users have been added, they will receive an email inviting them to join PromoPrep.
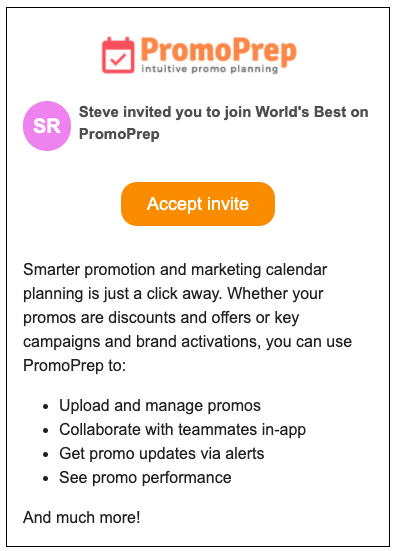
You can track users that have not accepted the invite in the Invited Users tab of the User page. You can also resend an invitation to users.

Once a user accepts the invitation, they will be taken through the user setup process to create their account.
Adjusting User Permissions
If a user’s permissions need to change, go to the User page under the main menu. Click Edit for the user.

On the user edit page, admins have the option to change permission levels, email alert settings and access permission to activities assigned to labels.
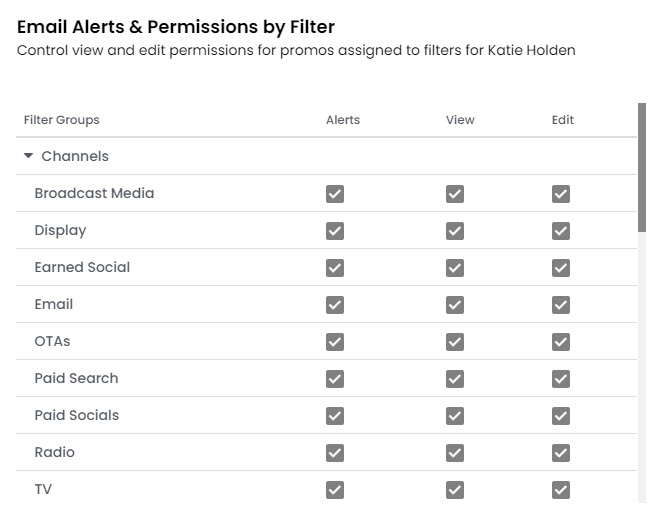
Admins can adjust the activities users can access using filter permissions. For example, if an activity is assigned to ’email’ and this user does not need access to ’email’ activities, then remove the View selection.
For Promo Manager users, you can also remove edit permissions based on filters. Email alerts can also be turned on and off at the filter level:
Tip
If you have a complicated marketing calendar let us help! We will prep and upload your promo calendar for free. Contact us or chat our support staff in the chat window in the bottom right of the screen to gets started.