PromoPrep Logo
  • How it works
    • Features
      • Capture – Every marketing detail you need in one spot.
      • Performance – GA & Shopify data on your calendar daily.
    • .
      • Organize – Configure your calendar the way you want.
      • Collaborate – Keep things moving with team messaging.
    • See all features >>
      • Alerts – Real-time alerts so everyone stays in-sync.
      • Plan – See last year’s marketing with a single click.
    • Use Cases
      • Email – Plan out every email and share with your team.
      • Content – Visualize your content marketing in one place.
  • Pricing
  • Integrations
    • Google Analytics – Daily revenue overlaid on your calendar.
    • Shopify – Daily sales overlaid on your calendar.
  • Support
    • Help Center
    • Contact us
  • Try Live Demo
    • Login to the Demo >> – Try the PromoPrep demo and see how it works.
    • or…
    • Schedule a demo – Learn more from our support team.
  • Login
Start for Free

PromoPrep Help Center

Generic selectors
Exact matches only
Search in title
Search in content
Post Type Selectors
help-center

  • Other Articles
  • Account Settings
    • Company Settings
    • Users & Permissions
    • User Profile Settings
  • Managing Activities
    • Adding Activities
    • Recurring Activities
    • Importing Activities
    • Activity Labels
    • Custom Form Fields
    • Creating Color Rules
    • Activity Alerts
    • PromoBuzz
    • Downloading Activity
    • Searching for Activities
    • FAQs
  • Using the Calendar
    • Calendar View
    • List View
    • Printing the Calendar
  • Performance Reports
    • Performance Tracking

Help Center » Adding Additional Companies

Adding Additional Companies

Learn how to add multiple companies to your PromoPrep account.

If you work with multiple brands or companies and you want to create different calendars for each company, you can do this by creating a new company in PromoPrep.

This works well for holding companies where you oversee different brands across the holding company. Or, if you work at an agency, you can create new accounts for different clients to keep calendars and billing separate.

Each company has its own company settings, calendar view, activity filters, custom fields, integration connectors (ie: Google Analytics connections) and billing settings.

 Note

You need an active account set up and be logged as an admin to set up a new company.

Step 1: From the menu, go to Add New Company:

Add new company to PromoPrep

Step 2: Add company details to the company info page and hit Save:

Company Info Screen

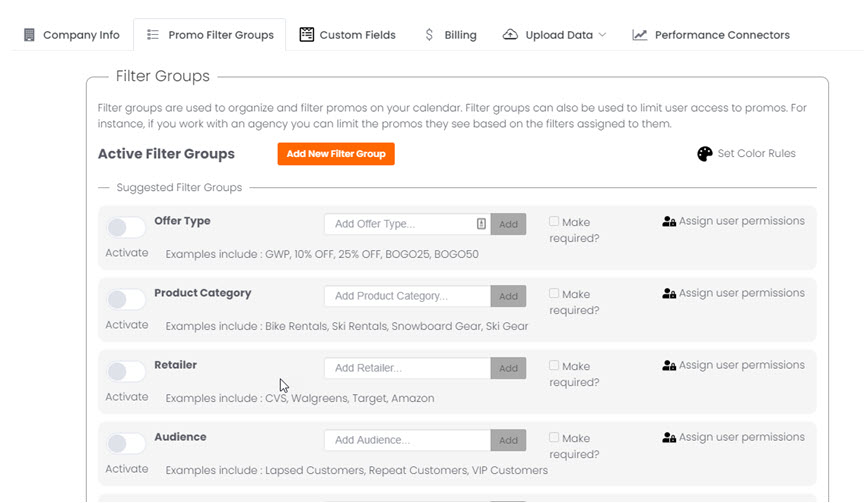
Step 3: Add filter groups, create color rules, and add custom fields for your new company:

Filter Groups

Step 4: Go to the billing tab and select a plan.

 Note

Small Business & Premium plans have the same features, but Premium has unlimited users and Small Business has a limited of 3 users.

Billing Setup


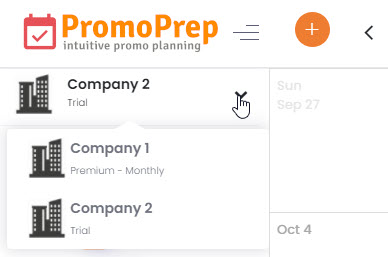
Once your new company is set up, click on the PromoPrep logo to go back to the calendar.

You now have an option to select between companies to change between calendars:

Now that your new company is set up, don’t forget to add new users to your new company.  You can change permission levels of each user based on the company they are connected to. Learn more about setting up users here. 


  • Features
  • Solutions
  • Integrations
  • Pricing
  • Login
  • Policies
  • Marketing Resources